Mackie ProFX12v3 Manual: A Comprehensive Guide

This manual provides detailed instructions for operating the Mackie ProFX12v3 mixer, covering setup, features, troubleshooting, and advanced techniques for optimal performance.
The Mackie ProFX12v3 is a versatile and compact 12-channel mixer designed for both live sound reinforcement and recording applications. It blends professional-grade features with an intuitive layout, making it suitable for musicians, podcasters, and content creators. This mixer builds upon the legacy of the ProFX series, offering enhanced sound quality, a robust effects engine, and seamless USB connectivity.
At its core, the ProFX12v3 provides twelve channels of input, accommodating a variety of sources like microphones, instruments, and line-level devices. Its integrated effects processor delivers a range of reverbs, delays, and modulation effects, adding depth and polish to your sound. The built-in USB interface enables direct recording and playback to a computer, simplifying the workflow for music production and live streaming. This manual will guide you through every aspect of the ProFX12v3, ensuring you unlock its full potential.
Unboxing and Initial Setup
Upon unboxing your Mackie ProFX12v3, carefully inspect the contents to ensure all components are present. These include the mixer itself, a USB cable, and this user manual. Before connecting any devices, familiarize yourself with the rear panel connections: XLR and ¼-inch inputs, USB port, headphone output, and main outputs.
To begin, connect the included USB cable to the mixer and your computer. Your computer should automatically recognize the ProFX12v3 as an audio interface. Download and install any necessary drivers if prompted, though most modern operating systems are plug-and-play compatible. Next, connect your microphones and instruments to the appropriate inputs. Ensure the mixer is powered off during connections. Finally, power on the mixer and adjust the main fader to a low level before gradually increasing the volume to prevent unexpected loud sounds.

Understanding the ProFX12v3 Features
The ProFX12v3 boasts a versatile mixer section, a powerful effects engine, and a flexible USB interface, offering comprehensive control and connectivity for diverse audio applications.
Mixer Section Overview
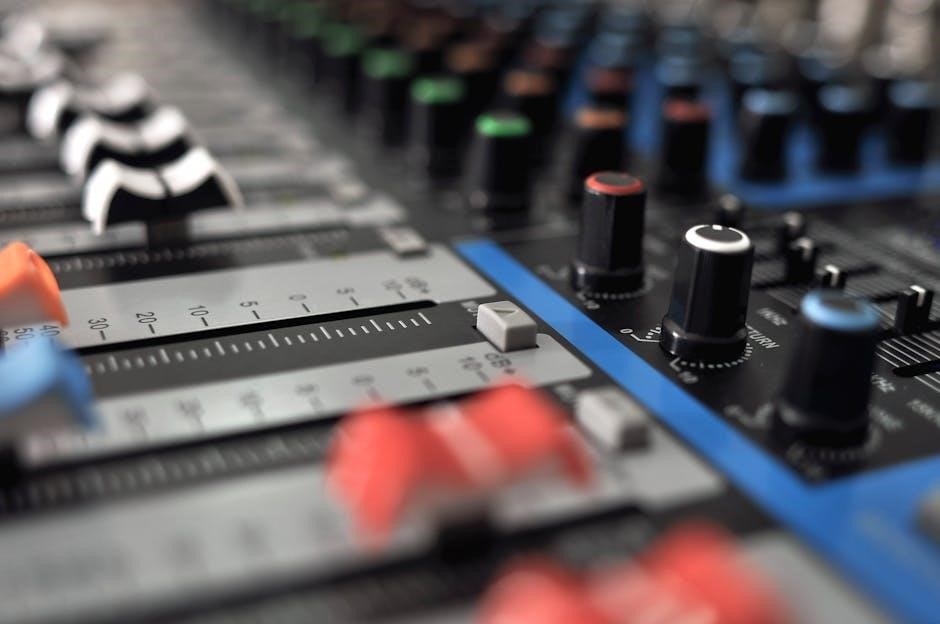
The ProFX12v3’s mixer section is designed for intuitive operation and exceptional audio quality. It features twelve channels, comprised of four mono microphone/line inputs and four stereo line inputs. Each mono channel includes a three-band EQ – high, mid, and low – allowing precise tonal shaping. Phantom power is available for condenser microphones, expanding your recording options. Gain controls on each channel provide optimal signal levels, while dedicated pan controls position sounds within the stereo field.
The mixer also incorporates aux sends for creating monitor mixes or feeding external effects processors. Built-in compressors on the first two mono channels help control dynamics and achieve a polished sound. Level meters provide visual feedback on signal strength, preventing clipping and ensuring optimal recording levels. The intuitive layout and clearly labeled controls make the ProFX12v3 accessible for both beginners and experienced users.
Effects Engine Details
The ProFX12v3 boasts a versatile 16-effect engine, offering a wide range of processing options to enhance your audio. These effects include reverbs, delays, choruses, and more, catering to diverse musical styles and applications. Each effect is easily selectable via dedicated buttons and a clear LCD display. Parameters like time, depth, and feedback can be adjusted to customize the sound to your preference.
The effects engine can be applied to individual channels or the main mix, providing flexibility in sound design. Presets are available for quick access to commonly used effects settings. Mackie’s renowned sound quality ensures that the effects are transparent and musical, adding depth and dimension without coloring the original signal. The intuitive interface allows for quick and easy effect selection and adjustment, even during live performances.
USB Interface Functionality
The ProFX12v3 integrates a built-in USB 2.0 interface, enabling seamless connectivity with computers for recording and playback. This interface supports 2-in/2-out audio streaming, allowing you to record stereo mixes or individual channels directly to your DAW (Digital Audio Workstation). No external audio interface is required, simplifying your setup and reducing cable clutter.
The USB connection also facilitates playback from your computer, allowing you to mix backing tracks or pre-recorded audio with live instruments and vocals. Mackie’s USB drivers ensure reliable performance and low latency, crucial for real-time recording and monitoring. The interface is class-compliant, meaning it works with most major operating systems without the need for additional driver installation. This feature streamlines the workflow for musicians, podcasters, and content creators.

Connecting Your Equipment
Proper connections are vital for optimal audio quality. This section details connecting microphones, instruments, and other audio sources to the ProFX12v3 mixer effectively.
Microphone Inputs and Gain Staging
The ProFX12v3 features multiple XLR microphone inputs, each equipped with a high-quality preamplifier. Understanding gain staging is crucial for achieving a clean and professional sound. Begin by connecting your microphone using an XLR cable to one of the designated input channels.
The ‘Gain’ knob controls the input signal’s strength. Adjust it carefully to avoid clipping (distortion caused by too strong a signal) or excessive noise (from a signal that’s too weak). Watch the signal level meters – aim for a healthy level peaking around -12dBFS.
Engage the 48V Phantom Power switch when using condenser microphones, providing the necessary power for their operation. Remember to always mute the channel before engaging or disengaging phantom power to prevent potential speaker damage. Utilize the high-pass filter to reduce unwanted low-frequency rumble or noise. Proper gain staging ensures a strong, clear signal throughout your audio chain.
Line Inputs and Signal Flow
The ProFX12v3 offers versatile line inputs, accepting signals from instruments, audio interfaces, and other line-level sources. These inputs, typically connected via ¼-inch TRS or TS cables, bypass the microphone preamplifiers, providing a direct signal path. Understanding the signal flow is key to effective mixing.
Signal enters through the line input, then passes through the channel’s EQ section for tonal shaping. Next, it reaches the aux sends for creating monitor mixes or feeding external effects processors. The signal then proceeds to the channel fader, controlling the overall volume.

Ensure proper impedance matching between your source device and the ProFX12v3 for optimal signal transfer. Adjust the input level using the corresponding ‘Gain’ control, aiming for a strong, clean signal without clipping. Careful attention to signal flow and levels ensures a polished and professional mix.
Headphone and Monitor Outputs
The Mackie ProFX12v3 provides dedicated outputs for both headphone monitoring and connecting studio monitors. These outputs allow for critical listening during mixing and tracking, as well as delivering the final mix to your listening environment. The headphone output features a dedicated level control for adjusting the volume to a comfortable listening level.
Monitor outputs, typically connected via balanced TRS cables, send the main mix signal to your studio monitors. These outputs benefit from the mixer’s overall output level control, allowing you to manage the overall volume sent to your monitors.
Utilizing both outputs simultaneously enables performers to hear a custom monitor mix through headphones while the main mix is sent to the studio monitors. Proper gain staging on both outputs is crucial to avoid clipping and ensure a clean, clear signal throughout the monitoring chain.

ProFX12v3 Controls and Operation
Mastering the ProFX12v3’s controls unlocks its full potential, enabling precise adjustments to EQ, effects, and levels for a professional, polished sound.
EQ Controls: Shaping Your Sound
The ProFX12v3’s EQ section offers comprehensive tonal control, allowing you to sculpt your audio with precision. Each channel features a 3-band EQ – High, Mid, and Low – providing flexible frequency adjustments. The High EQ controls brightness and air, while the Low EQ manages the fullness and warmth of your sound. The Mid EQ is crucial for defining the core character of instruments and vocals, preventing muddiness or harshness.
Understanding the frequency ranges is key to effective EQing. Experiment with subtle boosts and cuts to enhance desirable frequencies and reduce unwanted ones. Avoid excessive boosting, which can introduce noise and distortion. Instead, focus on cutting frequencies that clash or sound unpleasant. The EQ controls are highly responsive, enabling you to quickly dial in the perfect sound for any source. Remember to listen critically and make adjustments in small increments for optimal results.
Effects Parameter Adjustments
The ProFX12v3’s built-in effects engine provides a versatile palette of sounds, from reverb and delay to chorus and modulation. Adjusting the effect parameters allows you to customize these sounds to perfectly suit your audio. Each effect features dedicated controls for parameters like Time, Depth, Feedback, and Mix. Experimenting with these settings is crucial for achieving the desired sonic texture.
The ‘Time’ control adjusts the delay or reverb time, while ‘Depth’ controls the intensity of the effect. ‘Feedback’ determines the number of repeats in a delay or the density of a reverb tail. The ‘Mix’ control blends the dry (unaffected) signal with the wet (effected) signal, allowing you to subtly enhance or dramatically transform your sound. Start with conservative settings and gradually increase parameters until you achieve the desired effect, always listening critically to avoid over-processing.
USB Recording and Playback
The ProFX12v3 features a built-in USB interface enabling direct recording and playback with your computer. This eliminates the need for an external audio interface for basic recording tasks. Connect the mixer to your computer using a USB cable, and your computer should recognize it as an audio device. Select the ProFX12v3 as your input and output device within your Digital Audio Workstation (DAW) software.
For recording, route the desired channels to the USB send. Adjust the USB send level for each channel to control the recording volume. During playback, the ProFX12v3 will output the audio through its main outputs or headphone outputs. Ensure proper gain staging to avoid clipping or excessive noise. The USB interface supports stereo recording and playback at up to 16-bit/48kHz resolution.

Troubleshooting Common Issues
This section addresses frequent problems encountered with the ProFX12v3, offering solutions for no sound, USB connectivity, and feedback prevention for smooth operation.
No Sound Troubleshooting
Experiencing silence? Begin by verifying the physical connections of all cables – microphones, instruments, and outputs. Ensure the ProFX12v3 is receiving power and that the master fader isn’t muted or set to a minimum level. Check individual channel faders and pan controls, confirming they are appropriately positioned for desired output.
Next, inspect the input gain stages. Insufficient gain will result in a weak or absent signal. Conversely, excessive gain can cause distortion and clipping. Utilize the peak LEDs on each channel to monitor input levels. Confirm that the correct input source is selected for each channel.
If using USB, verify the ProFX12v3 is recognized by your computer and selected as the audio interface within your DAW or system settings. Check the USB routing options within the mixer’s menu. Finally, test with different cables and sources to isolate the problem.
USB Connection Problems
Encountering USB connectivity issues? First, ensure you’re using a USB 2.0 compliant cable, as the ProFX12v3 is optimized for this standard. Try a different USB port on your computer; some ports may provide insufficient power or have compatibility issues. Verify the mixer is powered on before connecting the USB cable to your computer.
Check your computer’s operating system for updated drivers. While the ProFX12v3 is often plug-and-play, installing the latest drivers from Mackie’s website can resolve compatibility problems. Within your computer’s audio settings, confirm the ProFX12v3 is selected as both the input and output device.
If the mixer isn’t recognized, attempt a factory reset (refer to the manual for instructions). Also, test the USB connection with another computer to determine if the issue lies with the mixer or your primary system.
Feedback Prevention Techniques
Feedback, that piercing squeal, is a common issue in live sound. Prevention starts with microphone placement – avoid pointing microphones directly at speakers. Utilize the ProFX12v3’s EQ to attenuate frequencies prone to feedback; gently reduce gain in the problematic ranges rather than drastic cuts.
Gain staging is crucial. Ensure input gains are set appropriately; too high, and you risk early distortion and feedback. Employ the mixer’s high-pass filter (HPF) to remove low-frequency rumble, which often contributes to feedback. Monitor levels carefully and gradually increase volume until you approach the feedback threshold.
Consider using monitor mixes to provide performers with a clear sound without directly feeding back through the main speakers. If feedback occurs, immediately lower the relevant channel’s gain or EQ.

Advanced Features and Tips
Explore routing options and effects combinations for unique sounds. Utilize the USB interface for recording and streaming, optimizing settings for superior audio quality and performance.
Using the ProFX12v3 for Live Streaming
The Mackie ProFX12v3 excels as a central hub for live streaming setups. Its integrated USB interface allows for seamless audio transmission to your computer, enabling direct integration with popular streaming software like OBS Studio, XSplit, or Streamlabs Desktop. Prioritize selecting the ProFX12v3 as your audio input device within your streaming application’s settings.
Leverage the mixer’s EQ and effects to refine your audio signal, ensuring a polished and professional sound for your audience. Utilize the built-in compressor on microphone channels to control dynamic range and prevent clipping. Monitor your audio levels carefully within both the ProFX12v3 and your streaming software to avoid distortion or excessively quiet segments. Experiment with different effects to add character and depth to your stream’s audio.
Consider utilizing dedicated monitor mixes to provide separate audio feeds for yourself and your audience, allowing for customized listening experiences. Remember to test your entire setup thoroughly before going live to identify and resolve any potential issues.
Setting Up Monitor Mixes
Creating monitor mixes with the ProFX12v3 allows performers to hear a customized blend of audio, separate from the main output sent to the audience or stream. Utilize the Aux sends (Aux 1 & Aux 2) on each channel to route signals to your monitor outputs. Adjust the Aux send levels individually for each channel to craft the desired mix for each performer.
Connect powered monitors or headphones to the Main or Aux outputs. The ProFX12v3’s flexible routing allows for independent control over monitor levels. Ensure performers have individual volume controls on their monitors or headphones for personal preference adjustments. Remember that Aux sends are pre-fader, meaning adjustments to the channel faders won’t affect the monitor mix levels.
Carefully balance the levels in each monitor mix to provide a clear and comfortable listening experience for each musician, focusing on the instruments they need to hear most prominently.
Optimizing USB Recording Quality

Achieving high-quality USB recordings with the ProFX12v3 requires attention to several key settings. First, ensure your computer meets the mixer’s system requirements for stable USB audio transfer. Within your recording software (DAW), select the ProFX12v3 as the audio input device and set the sample rate and bit depth – 44.1kHz/24-bit is a good starting point.
Proper gain staging is crucial. Adjust channel gains to achieve a strong signal without clipping (distortion). Monitor the input levels within your DAW and aim for peaks around -6dBFS. Utilize the ProFX12v3’s built-in EQ and compression to refine the sound before recording.
Minimize background noise by recording in a quiet environment and using quality cables. Regularly check for driver updates for both the mixer and your audio interface to ensure optimal performance and stability during lengthy recording sessions.