Costco Gluten-Free Pizza Instructions: A Comprehensive Guide (Updated 03/06/2026)
Recent years have witnessed a surge in gluten-free options, and Costco actively caters to customers seeking wheat-free alternatives, especially with their pizza offerings.
Costco’s gluten-free pizza represents a significant offering for individuals navigating dietary restrictions or preferences. Recognizing the growing demand for gluten-free options, Costco has responded with a convenient and accessible pizza solution. This isn’t just about accommodating a niche market; it’s about inclusivity and providing choices for a broader customer base.
The availability of a readily available, frozen gluten-free pizza at Costco simplifies meal planning for those avoiding wheat, gluten, or related proteins. It eliminates the need for extensive ingredient sourcing and preparation, offering a quick and easy meal option. The pizza is designed to be baked at home, providing a familiar and comforting experience without compromising dietary needs.

This guide aims to provide a comprehensive walkthrough of preparing Costco’s gluten-free pizza, from unboxing to enjoying a perfectly baked slice. We’ll cover everything from oven temperatures and baking times to topping suggestions and troubleshooting common issues, ensuring a satisfying experience for every pizza lover.
Why Choose Costco Gluten-Free Pizza?
Selecting Costco’s gluten-free pizza offers several compelling advantages for consumers. Primarily, it provides a convenient and affordable solution for those adhering to a gluten-free diet, eliminating the often-complex process of homemade gluten-free pizza creation. Costco’s bulk purchasing power translates to a competitive price point, making it a budget-friendly option compared to many specialty gluten-free pizzas.
Beyond cost and convenience, Costco prioritizes accessibility. Finding gluten-free products can sometimes be challenging, but Costco’s widespread locations and readily available stock ensure consistent access. The pizza also caters to varying preferences, serving as a blank canvas for customized toppings, allowing individuals to create a pizza tailored to their tastes.
Furthermore, choosing Costco supports a retailer responsive to dietary needs, encouraging continued innovation and expansion of gluten-free offerings within their product line. It’s a practical choice that doesn’t compromise on flavor or quality.
Understanding Gluten-Free Certification & Costco
Navigating gluten-free labeling can be complex, and understanding Costco’s approach is crucial for informed purchasing. While specific certifications may vary, Costco generally partners with suppliers who adhere to strict gluten-free standards, often aiming for less than 20 parts per million (ppm) of gluten – the widely accepted threshold for gluten-free designation.
It’s important to note that “gluten-free” doesn’t necessarily equate to “certified.” Costco prioritizes supplier accountability and rigorous testing protocols to ensure product safety and compliance. Consumers should always check the product packaging for specific gluten-free claims and certification logos (like the Gluten-Free Certification Organization ⎻ GFCO) for added assurance.
Costco’s commitment extends to minimizing cross-contamination during production and handling. They work closely with manufacturers to implement preventative measures, safeguarding the integrity of their gluten-free offerings and providing peace of mind to sensitive individuals.

Preparing the Pizza for Baking
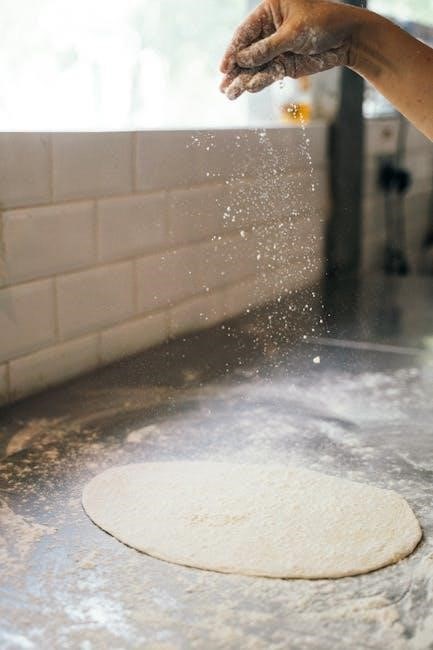
Before baking, careful preparation ensures optimal results with your Costco gluten-free pizza, starting with a thorough unboxing and inspection of all components.
Unboxing and Initial Inspection
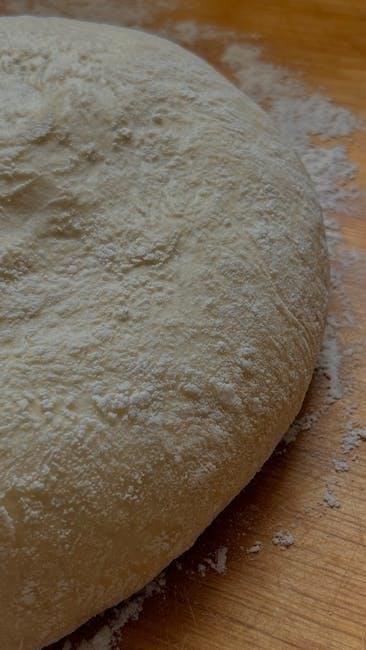
Upon receiving your Costco gluten-free pizza, begin by carefully removing it from its packaging. Gently open the box and lift out the frozen pizza, noting its overall condition. Check for any signs of damage to the crust or the packaging itself, such as tears or punctures, which could indicate compromised quality.
Next, inspect the toppings. Ensure they are securely adhered to the crust and haven’t shifted significantly during transit. Verify that all included components – the pizza itself, any sauce packets, or cheese portions – are present. A quick visual assessment will confirm everything is accounted for.
Pay close attention to the crust’s appearance. It should be uniformly frozen and free from any discoloration or unusual textures. If you notice any irregularities, it’s best to contact Costco customer service before proceeding. A thorough initial inspection sets the stage for a successful baking experience and ensures a delicious, gluten-free pizza.
Preheating Your Oven – Temperature & Time
Achieving the perfect bake with your Costco gluten-free pizza hinges on proper oven preheating. For optimal results, preheat your oven to 425°F (218°C). This temperature ensures the crust cooks thoroughly while melting the cheese and heating the toppings evenly. Allow at least 20-25 minutes for the oven to reach the desired temperature; a fully preheated oven is crucial for consistent baking.
Using an oven thermometer is highly recommended to verify the internal temperature, as ovens can sometimes be inaccurate. If your oven has a convection setting, you can use it, but reduce the temperature by 25°F (14°C) and monitor closely.
Proper preheating guarantees a crispy crust and prevents a soggy center. Don’t rush this step! A well-preheated oven is the foundation for a delicious, restaurant-quality gluten-free pizza experience right in your kitchen. Patience is key to pizza perfection.
Preparing the Baking Surface (Parchment Paper/Pizza Stone)
Selecting the right baking surface significantly impacts the texture of your Costco gluten-free pizza. While a pizza stone is ideal for achieving a supremely crispy crust, parchment paper offers a convenient and mess-free alternative. If using a pizza stone, ensure it’s preheated inside the oven during the preheating process – this prevents cracking and ensures even heat distribution.
For parchment paper, cut a piece slightly larger than the pizza’s diameter. This prevents sticking and simplifies cleanup. Lightly dusting the parchment with cornmeal can further enhance crispiness and prevent the crust from adhering. Avoid using wax paper, as it will melt at high temperatures.
Regardless of your choice, proper preparation is essential for easy removal and a beautifully baked pizza. A well-prepared surface guarantees a delightful culinary experience.

Baking Instructions: Step-by-Step
Carefully transfer the prepared pizza onto the preheated baking surface, ensuring even placement for consistent cooking and a perfectly golden, delicious final product.
Recommended Oven Temperature for Optimal Results
Achieving the perfect bake with your Costco gluten-free pizza hinges on precise oven temperature control. While individual ovens may vary, a consistent 400°F (204°C) is generally recommended as the sweet spot for optimal results.
This temperature ensures the crust cooks through completely, achieving a desirable level of crispness without burning the toppings. Lower temperatures may result in a soggy crust, while excessively high heat could lead to a charred exterior before the center is fully cooked.
It’s crucial to allow your oven to fully preheat to 400°F before introducing the pizza. Using an oven thermometer is highly advisable to verify the actual internal temperature, as many ovens are not perfectly calibrated. Consistent heat distribution is also key; avoid overcrowding the oven with other items during baking. Remember, a properly heated oven is the foundation for a fantastic gluten-free pizza experience!
Baking Time Guidelines (Based on Crust Thickness)
Determining the ideal baking time for your Costco gluten-free pizza depends significantly on the crust’s thickness, which can vary slightly. As a general guideline, start with 12-15 minutes for a thinner crust and 15-18 minutes for a thicker crust.
However, these are merely starting points; visual cues are paramount. Begin checking the pizza around the 12-minute mark. The crust should be golden brown and firm to the touch. The cheese should be melted and bubbly, with slight browning in spots.
If the crust isn’t quite crisp enough, continue baking in 2-minute increments, checking after each interval. Avoid overbaking, as gluten-free crusts can become brittle. Consistent monitoring and adjustment based on your oven and the specific pizza are crucial for achieving a perfectly baked result.
Checking for Doneness – Visual Cues
Assessing your Costco gluten-free pizza’s readiness relies heavily on observing key visual indicators. The crust is the primary signal; it should transition to a golden-brown hue, indicating sufficient baking. Gently lift an edge to confirm it’s firm and structurally sound, avoiding any sogginess.
Next, examine the cheese. It needs to be fully melted, exhibiting a bubbly texture with areas of light browning. If the cheese remains pale and unmelted, extend the baking time. Finally, inspect any toppings. They should appear heated through and slightly caramelized.
Remember, gluten-free crusts don’t brown exactly like traditional wheat-based crusts, so rely more on firmness and overall color than expecting a deep golden shade. Consistent visual checks throughout the final minutes of baking are key to pizza perfection.
Toppings & Customization
Unleash your culinary creativity! Costco’s gluten-free pizza serves as a blank canvas for diverse toppings, allowing for personalized flavor profiles and dietary preferences.
Suggested Topping Combinations
For the classic enthusiast, a pepperoni and mushroom pairing delivers timeless satisfaction on Costco’s gluten-free crust. Elevate this with a sprinkle of Italian seasoning for enhanced aroma.
If you prefer a vibrant, Mediterranean twist, consider a combination of sun-dried tomatoes, Kalamata olives, feta cheese, and a drizzle of pesto. This offers a delightful balance of salty and tangy flavors.
Spice lovers will adore a fiery blend of jalapeños, chorizo, and pepper jack cheese. A touch of pineapple can provide a sweet counterpoint to the heat.
A sophisticated option involves roasted red peppers, caramelized onions, goat cheese, and a balsamic glaze. This creates a complex and refined taste experience.
For a simple yet satisfying choice, try a combination of spinach, artichoke hearts, and mozzarella cheese. This is a light and flavorful option perfect for any occasion.
Don’t be afraid to experiment and create your own signature combinations!
Adding Extra Cheese – Types & Amounts
Enhance your Costco gluten-free pizza with a generous layer of extra cheese! Mozzarella remains a classic choice, approximately 1.5 to 2 cups for full coverage.
For a richer flavor, incorporate provolone – about 1 cup complements mozzarella beautifully. A sprinkle of Parmesan cheese (0.5 cup) adds a salty, umami kick.
If you enjoy a sharper taste, consider adding some aged cheddar (1 cup), but be mindful as it can overpower other flavors. Monterey Jack (1 cup) offers a mild, creamy texture.
For a gourmet touch, try a blend of Gruyère and Fontina (0.75 cup each) – these melt exceptionally well and provide a nutty, complex flavor profile.
Remember to distribute the cheese evenly across the pizza for consistent melting and optimal enjoyment. Avoid overloading, as this can lead to a soggy crust.
Experiment with different combinations to discover your perfect cheesy masterpiece!
Vegetarian & Vegan Topping Options
Costco’s gluten-free pizza provides a fantastic base for vibrant vegetarian and vegan creations! Classic options like sliced mushrooms, bell peppers (red, green, yellow), and onions are always a hit.
For a Mediterranean twist, add Kalamata olives, sun-dried tomatoes, and artichoke hearts. Spinach and roasted garlic offer a flavorful, healthy boost.
Vegan cheese alternatives, such as those made from cashew or almond milk, can replace dairy cheese for a fully plant-based experience.
Consider adding roasted vegetables like zucchini, eggplant, and butternut squash for a seasonal touch. Pineapple offers a sweet and tangy contrast.
Don’t forget fresh herbs! Basil, oregano, and rosemary elevate the flavor profile.
Experiment with pesto (vegan pesto is readily available) or a drizzle of balsamic glaze for added complexity.
Get creative and build your perfect meat-free pizza!
Post-Baking & Serving
Allow the pizza to cool slightly before slicing for optimal texture and flavor. Enjoy immediately with a fresh salad or your favorite dipping sauce!
Cooling Time & Cutting Instructions
After removing your beautifully baked Costco gluten-free pizza from the oven, resist the immediate urge to dive in! Allowing a proper cooling period is crucial for achieving clean slices and preventing a messy, cheese-sliding experience. We recommend letting the pizza rest for at least 5-7 minutes on a wire rack. This allows the cheese to set slightly and the crust to firm up, making it much easier to cut.
For the best results, use a pizza cutter or a large, sharp knife. A rocking motion with the knife works well, ensuring a clean cut through both the crust and toppings. Avoid sawing back and forth, as this can drag the toppings and create uneven slices. If you find the cheese is still too stretchy, wait another minute or two before cutting. Remember, patience is key to enjoying perfectly presented and easily manageable slices of your delicious Costco gluten-free pizza!
Serving Suggestions & Side Dishes
Your freshly baked Costco gluten-free pizza deserves a fantastic supporting cast! To elevate your pizza night, consider a vibrant salad – a simple mixed green salad with a light vinaigrette provides a refreshing contrast to the richness of the pizza. For a heartier option, a Caesar salad with gluten-free croutons is always a crowd-pleaser.
Don’t forget about appetizers! Gluten-free vegetable sticks with hummus or a creamy dip offer a healthy and flavorful start to the meal. A side of roasted vegetables, like broccoli or Brussels sprouts, complements the pizza beautifully. To quench your thirst, pair your pizza with sparkling water, iced tea, or your favorite gluten-free beverage. Finally, for dessert, a fruit salad or gluten-free cookies provide a sweet ending to a satisfying meal. Enjoy!
Storage Instructions for Leftovers
Proper storage is key to enjoying your Costco gluten-free pizza even after the first serving! Allow leftover pizza to cool completely before storing. This prevents condensation, which can make the crust soggy. Once cooled, transfer the slices to an airtight container or tightly wrap them in plastic wrap, then aluminum foil.
Refrigerate promptly – within two hours is ideal – to maintain freshness and prevent bacterial growth. Properly stored, leftover pizza will generally stay good in the refrigerator for up to 3-4 days. For longer storage, consider freezing. Wrap individual slices tightly and place them in a freezer-safe bag or container. Frozen pizza can last for up to 2-3 months. Reheat thoroughly before consuming, ensuring the internal temperature reaches 165°F (74°C).
Troubleshooting Common Issues
Baking gluten-free pizza can present unique challenges; however, understanding potential problems and their solutions ensures a delicious outcome every time you bake.
Crust is Soggy – Causes & Solutions
A soggy crust is a frequent concern when baking gluten-free pizzas, stemming from several potential issues. Often, insufficient oven temperature prevents proper crust crisping, leaving it damp and pliable. Another culprit is excess moisture from toppings – particularly fresh vegetables or sauces – that haven’t been adequately drained.
To combat sogginess, ensure your oven is fully preheated to the recommended temperature (detailed in the baking instructions). Consider pre-baking the crust for 5-7 minutes before adding toppings; this creates a firmer base. If using vegetables, sauté them briefly to release excess water.
Furthermore, avoid overloading the pizza with sauce. A thinner, even layer is preferable. Utilizing a pizza stone or baking steel can also significantly improve crust crispness by providing direct heat. Finally, ensure proper airflow around the pizza during baking; avoid overcrowding the oven.
Crust is Too Hard – Causes & Solutions
Encountering a crust that’s excessively hard or brittle can be disappointing. This typically arises from overbaking, leading to excessive moisture loss and a tough texture. Another common cause is an oven temperature that’s too high, rapidly drying out the crust before the toppings are fully heated. Insufficient oil in the dough formulation can also contribute to a dry, hard result.
To remedy a hard crust, reduce the baking time in subsequent attempts, checking for doneness a few minutes earlier than the guidelines suggest. Lowering the oven temperature by 25°F can also help. Consider lightly brushing the crust with olive oil before baking to add moisture and improve pliability.
If the issue persists, try placing a small oven-safe dish of water in the oven during baking; this creates steam, preventing excessive drying. Avoid prolonged baking, and monitor the pizza closely, especially during the final minutes.
Toppings Not Fully Cooked – Adjustments Needed
If your toppings aren’t fully cooked, especially meats like pepperoni or sausage, it usually indicates insufficient baking time or an oven temperature that’s too low. Thickly sliced or densely packed toppings require longer to reach the proper internal temperature. Placing cold toppings directly onto the pizza can also extend the cooking process, hindering complete heating.
To address this, extend the baking time in 2-3 minute increments, carefully monitoring the toppings. Ensure your oven is accurately calibrated and reaching the recommended temperature. Pre-cooking certain toppings, like sausage or vegetables, can significantly reduce their required baking time on the pizza.
Distribute toppings evenly across the crust to promote uniform cooking. Consider using smaller pieces of toppings for faster and more thorough heating.