Trailer Brake System Fault: A Comprehensive Guide
Understanding trailer brake systems is crucial for safe towing; mis-adjustments and failures dramatically increase stopping distances, potentially leading to collisions or loss of control.
Understanding the Importance of Trailer Brakes
Trailer brakes are a vital safety component, significantly enhancing control and reducing stopping distances when towing. Relying solely on the towing vehicle’s brakes is insufficient, especially with heavier loads; the combined weight demands a supplementary braking system. Equipment trailer brake malfunctions, including mis-adjustments, can dramatically increase stopping distances, escalating the risk of collisions or complete loss of vehicle control.
Properly maintained trailer brakes contribute to safer road travel for everyone. Whether navigating suburban streets or country roads, a functional trailer brake system provides the necessary stopping power for various transport needs – boats, kayaks, or heavy equipment. Ignoring brake maintenance can lead to dangerous situations, emphasizing the importance of regular inspections and adherence to manufacturer guidelines, as detailed in your trailer’s manual.
Common Causes of Trailer Brake System Faults
Several factors can contribute to trailer brake system failures. Mis-adjustments are a frequent issue, directly impacting stopping distances and control. Worn components, such as brake shoes or pads, diminish braking effectiveness over time. Damage to brake drums or rotors compromises the braking surface, reducing friction and performance. Electrical faults within the brake controller or wiring can disrupt the signal to the trailer brakes.
Air brake systems are susceptible to leaks, reducing air pressure and hindering braking ability. Contamination from road debris or improper lubrication can also cause malfunctions. Always consult your trailer’s manual for specific troubleshooting guidance and maintenance schedules. Ignoring these potential issues can lead to hazardous driving conditions, emphasizing the need for proactive inspection and repair.
Diagnosing Trailer Brake System Issues
Thorough diagnosis requires visual inspection, checking brake lines, inspecting the controller, and testing electric brakes; refer to your manual for specifics.
Visual Inspection of Brake Components
A detailed visual inspection is the first step in diagnosing trailer brake system faults. Begin by carefully examining the brake drums or rotors for any signs of cracks, scoring, or excessive wear. Look closely at the brake shoes or pads, checking their thickness and ensuring even contact with the braking surface. Inspect the wheel cylinders for leaks – hydraulic fluid indicates a potential problem requiring immediate attention.
Pay attention to the brake lines and hoses, searching for any bulges, cracks, or corrosion. Ensure all connections are secure and free from leaks. Don’t forget to inspect the automatic adjusters, verifying they are functioning correctly to maintain proper brake shoe clearance. A thorough visual assessment provides valuable clues about the overall condition of the brake system and helps pinpoint potential issues before they escalate. Always consult your trailer’s manual for specific component locations and inspection procedures.
Checking Brake Lines and Hoses
Thoroughly inspect all brake lines and hoses for any signs of damage, a critical step in identifying trailer brake system faults. Look for bulges, cracks, abrasions, or corrosion along the entire length of the lines. Pay close attention to connections – ensure they are tight and free from any fluid leaks, indicating a potential breach in the system.
Flexibility is key; hoses should not feel brittle or stiff. Gently flex each hose to check for weakness or cracking. If any damage is detected, replace the affected lines or hoses immediately. Remember that compromised brake lines can lead to complete brake failure. Always refer to your trailer’s manual for the correct specifications and replacement procedures, ensuring compatibility and safe operation. Proper maintenance of brake lines is paramount for safe towing.
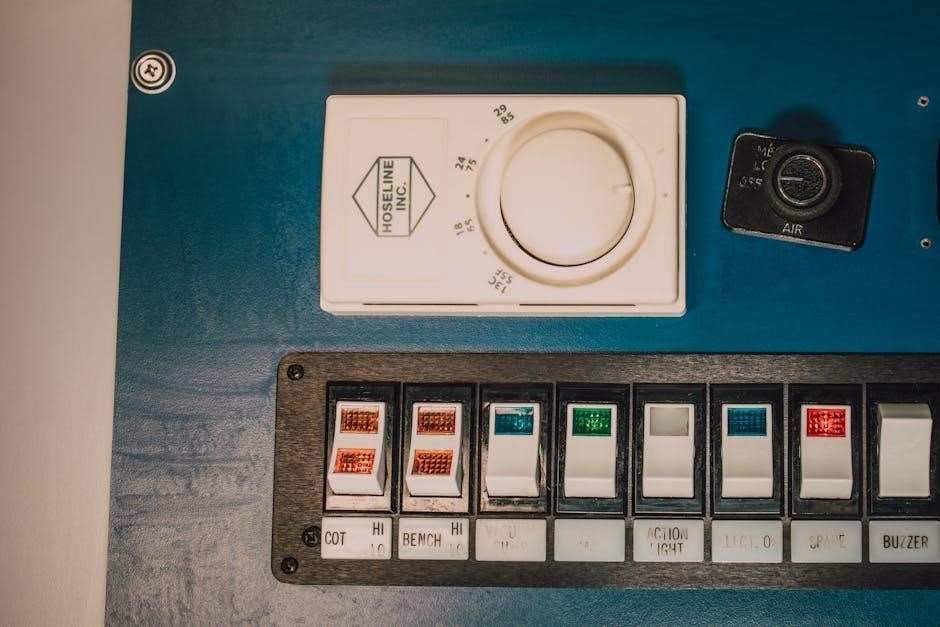
Inspecting the Brake Controller
The brake controller is the central hub for managing trailer brakes, so a thorough inspection is vital when diagnosing trailer brake system faults. Begin by verifying the controller’s power supply and ensuring it’s securely connected. Check the wiring harness for any loose connections, corrosion, or damage. Confirm that the controller’s settings – gain, power level, and sensitivity – are appropriately adjusted for your trailer and load, as outlined in your vehicle and trailer manuals.
Test the controller’s functionality by manually activating the brakes at various levels. Observe the brake lights on the trailer to confirm they illuminate correctly. Newer controllers may feature diagnostic capabilities; consult your manual for instructions on accessing and interpreting any error codes. A malfunctioning controller can severely compromise braking performance, so address any issues promptly.
Testing the Electric Brakes
Properly testing the electric brakes is essential for identifying trailer brake system faults. With the trailer safely supported, activate the brake controller and observe each wheel for consistent braking action. Listen for any unusual noises, such as grinding or squealing, which could indicate worn components or mechanical issues. Use an infrared thermometer to check for uneven heat distribution across the brake drums or rotors; significant temperature differences suggest a problem with a specific brake assembly.
If possible, perform a test drive in a safe, controlled environment, gradually increasing the brake controller’s gain to assess braking performance. Refer to your trailer’s manual for recommended gain settings. Ensure the trailer brakes engage smoothly and effectively without pulling to one side. Any inconsistencies or deficiencies warrant further investigation and repair.
Specific Faults and Their Symptoms
Common trailer brake faults include faulty wheel cylinders, worn shoes/pads, damaged drums/rotors, malfunctioning controllers, and air brake system leaks—consult your manual.
Faulty Wheel Cylinders
Wheel cylinders are vital components within the trailer brake system, responsible for converting hydraulic pressure into mechanical force to press the brake shoes against the drums. A failing wheel cylinder often manifests as a soft or spongy brake pedal, reduced braking efficiency on one or more wheels, or even complete brake failure on an affected wheel. Leaks around the wheel cylinder are a telltale sign, often appearing as brake fluid on the inside of the wheel or drum.
Internal corrosion within the cylinder can cause sticking pistons, leading to uneven brake application or brakes that drag. Thorough inspection involves checking for leaks, piston movement, and overall cylinder condition. Replacement is typically necessary when significant damage or leakage is detected, ensuring proper brake function and safety. Always refer to your trailer’s manual for specific procedures and torque specifications during replacement.
Worn Brake Shoes or Pads
Worn brake shoes or pads significantly diminish a trailer’s stopping power, representing a critical safety hazard. Reduced friction between the brake surface and the drum or rotor extends stopping distances and increases the risk of collisions. Symptoms include squealing or grinding noises during braking, a lower brake pedal, and diminished overall braking performance. Regular inspections are crucial to assess the remaining friction material thickness.
Thickness below the manufacturer’s specified minimum requires immediate replacement. Ignoring worn brake shoes can lead to damage to the brake drums or rotors, escalating repair costs. Always replace brake shoes in pairs on each axle to maintain balanced braking. Consult your trailer’s manual for the correct shoe or pad type and recommended replacement intervals, ensuring optimal brake system functionality and safety.
Damaged Brake Drums or Rotors
Damaged brake drums or rotors compromise the entire trailer braking system, creating a dangerous situation for drivers. Issues like cracks, warping, or excessive rust significantly reduce braking efficiency and can lead to complete brake failure. Visual inspection should reveal any physical damage, including scoring or uneven wear patterns. Warped rotors cause pulsating sensations during braking, while cracks indicate structural weakness.
Ignoring damaged drums or rotors can accelerate wear on brake shoes or pads and potentially cause them to fail prematurely. Replacement is often necessary when damage exceeds the manufacturer’s specified limits, detailed in your trailer’s manual. Always ensure proper drum or rotor resurfacing or replacement to maintain a smooth, consistent braking surface, maximizing safety and performance.
Malfunctioning Brake Controller
A malfunctioning brake controller is a frequent cause of trailer brake system faults, preventing proper signal transmission to the trailer’s electric brakes. Symptoms include inconsistent braking power, brakes locking up prematurely, or a complete lack of response from the trailer brakes. Controllers can fail due to internal electrical issues, wiring problems, or incorrect settings.
Carlisle Industrial Brake & Friction has debuted a family of trailer brake controllers designed to deliver enhanced stopping power and control. Refer to your trailer’s manual for specific controller compatibility and setup instructions. Testing the controller’s output with a multimeter is crucial for diagnosing electrical faults. Repair or replacement may be necessary, ensuring the controller accurately responds to the driver’s input for safe and effective braking.
Air Brake System Leaks
Air brake system leaks represent a significant hazard in trailer braking, leading to reduced braking efficiency and potentially complete brake failure. Leaks can occur in various components, including air lines, brake chambers, control valves, and the air reservoir itself. Consistent monitoring of air pressure is vital; a rapid pressure drop indicates a leak somewhere within the system.
The 11th edition of CCJ’s Air Brake Book, sponsored by SilverbackHD, provides a comprehensive resource for understanding air brake systems. Inspect all connections and components regularly for signs of wear, corrosion, or damage. Refer to your trailer’s manual for specific leak detection procedures and repair guidelines. Addressing leaks promptly is crucial for maintaining safe and reliable braking performance.

Troubleshooting Steps
Begin by adjusting brakes, bleeding lines, and replacing worn parts; consult your trailer’s manual for detailed procedures and specific component locations for repair.
Adjusting Trailer Brakes
Proper trailer brake adjustment is paramount for safe and effective stopping power, directly impacting overall towing safety. Regularly inspect and adjust brakes according to the trailer manufacturer’s specifications, found within your owner’s manual. Misadjusted brakes can lead to uneven wear, reduced braking efficiency, and significantly increased stopping distances, dramatically raising the risk of collisions.
The adjustment process typically involves accessing the brake adjustment hole on the wheel hub and utilizing a brake adjustment tool to rotate the star wheel. This alters the distance between the brake shoes and the drum. Consult your manual for the correct procedure and recommended clearance. Incorrect adjustment – too tight or too loose – will negatively affect performance. Always test the brakes after adjustment to ensure proper function and even braking across all axles.
Bleeding the Brake Lines
Air within the trailer brake lines compromises braking performance, resulting in a spongy pedal feel and reduced stopping power. Bleeding the brake lines removes this trapped air, restoring optimal hydraulic pressure and ensuring efficient braking. This process requires careful attention to detail and adherence to the manufacturer’s instructions, detailed in your trailer’s manual.
Typically, bleeding involves opening bleed screws at each wheel cylinder, while a partner pumps the brake pedal. Fluid, and any trapped air, will exit the screws. Continue until clear, bubble-free fluid emerges. Always use the correct brake fluid type specified in your manual. Ensure the master cylinder reservoir remains full throughout the process to prevent air re-entry. Improper bleeding can introduce more air, exacerbating the problem, so consult a professional if unsure.
Replacing Worn Components
Identifying and replacing worn components is essential for restoring a trailer’s braking efficiency. Common replacements include brake shoes or pads, wheel cylinders, brake drums or rotors, and occasionally, the entire brake assembly. Always refer to your trailer’s manual for specific part numbers and recommended replacement intervals.
When replacing components, ensure proper matching and compatibility. Use high-quality replacement parts designed for trailer applications. Thoroughly inspect all related hardware, such as springs and retainers, and replace them if worn or damaged. After installation, meticulously adjust the brakes according to the manual’s specifications. Incorrectly installed or adjusted components can lead to uneven braking or premature wear, compromising safety. If you lack experience, professional assistance is highly recommended.

Repairing or Replacing the Brake Controller
A malfunctioning brake controller can severely impact trailer braking performance. Initial troubleshooting involves checking connections, wiring, and the controller’s power supply. If the controller displays error codes, consult your trailer’s manual for interpretation and potential solutions. Simple repairs might include tightening connections or replacing fuses.
However, if the controller is damaged or consistently fails, replacement is often necessary. Carlisle Industrial Brake & Friction offers a new level of stopping power with their trailer brake controllers. Ensure the new controller is compatible with your vehicle’s electrical system and trailer brakes. Proper installation, following the manufacturer’s instructions and your vehicle’s manual, is crucial. Incorrect wiring can damage the controller or vehicle’s electrical system. Professional installation is advised if you’re unfamiliar with automotive electrical work.

Advanced Diagnostics
Utilizing a multimeter to test electrical components and interpreting diagnostic trouble codes (DTCs) are vital for pinpointing complex trailer brake system faults.
Using a Multimeter to Test Electrical Components
Employing a multimeter is essential when diagnosing electrical issues within the trailer brake system. Begin by testing the continuity of the wiring between the tow vehicle and the trailer, ensuring no breaks or shorts exist. Verify voltage at the trailer connector when the brakes are applied, confirming the signal from the brake controller is reaching the trailer.
Subsequently, check the resistance of the electric brake magnets; an open circuit indicates a faulty magnet. Measure the voltage drop across the brake controller, identifying potential internal failures. Always disconnect the battery before performing electrical tests to prevent accidental shorts. Refer to the trailer’s wiring diagram and the brake controller manual for specific voltage and resistance specifications. Accurate multimeter readings provide crucial insights into the electrical health of the system, aiding in precise fault isolation and repair.
Interpreting Diagnostic Trouble Codes (DTCs)
Modern trailer brake systems, particularly those integrated with advanced controllers, often store Diagnostic Trouble Codes (DTCs) when faults occur. These codes, accessible via a compatible diagnostic scanner, provide valuable clues regarding the nature of the problem. DTCs can pinpoint issues ranging from sensor failures and wiring faults to internal controller malfunctions.
However, interpreting these codes requires referencing the vehicle’s or trailer’s service manual, as code definitions can vary between manufacturers. A code indicating a “low voltage” condition might suggest a wiring issue or a failing battery, while a “sensor fault” code necessitates inspecting the associated sensor and its connections. Always clear the DTCs after repairs to verify the fix and monitor for recurrence. Proper DTC interpretation significantly streamlines the troubleshooting process, reducing diagnostic time and ensuring accurate repairs.
Preventative Maintenance
Regular brake inspections, lubrication of moving parts, and proper adjustments are vital for preventing trailer brake system faults and ensuring optimal performance.
Regular Brake Inspections
Consistent and thorough brake inspections are the cornerstone of preventative maintenance, directly impacting trailer safety and longevity. These inspections should encompass a detailed visual assessment of all brake components, including brake shoes or pads, drums or rotors, wheel cylinders, and brake lines. Look for signs of wear, damage, leaks, or corrosion.
Pay close attention to brake line condition, checking for cracks, bulges, or abrasions; Inspect the brake controller for proper functionality and ensure all electrical connections are secure and free from corrosion. Regular inspections allow for the early detection of potential issues, preventing minor problems from escalating into costly and dangerous failures. Following the manufacturer’s recommended inspection intervals, as outlined in your trailer’s manual, is paramount for maintaining a reliable brake system.
Lubrication of Moving Parts
Proper lubrication is vital for ensuring smooth operation and preventing premature wear of trailer brake components. Key areas requiring regular lubrication include wheel bearings, brake camshafts, and equalizer bars. Using a high-quality, trailer-specific grease is essential, as automotive grease may not provide adequate protection under the demanding conditions of trailer use.
Insufficient lubrication can lead to increased friction, heat buildup, and ultimately, component failure. Regularly inspect and lubricate all moving parts according to the manufacturer’s recommendations detailed in your trailer’s manual. This proactive approach minimizes the risk of brake system faults and extends the lifespan of critical components, contributing to safer and more reliable towing. Neglecting lubrication can dramatically increase the chance of collisions.
Proper Brake Adjustment
Maintaining correct brake adjustment is paramount for optimal stopping performance and preventing trailer brake system faults. Improperly adjusted brakes can lead to uneven wear, reduced braking efficiency, and even brake lockup. Regularly inspect the brake shoes or pads for wear and adjust the brakes according to the manufacturer’s specifications, found within your trailer’s manual.
Equipment trailer brake mis-adjustments dramatically increase stopping distances, elevating the risk of collisions or loss of control. Ensure each wheel receives equal braking force. A properly adjusted brake system distributes the braking load evenly, maximizing stopping power and minimizing stress on individual components. Consistent adjustment, as outlined in the manual, is a cornerstone of preventative maintenance and safe towing practices.

Safety Considerations
Professional repair is vital for complex trailer brake faults; always consult the manual and prioritize safety, especially during emergency brake failure scenarios.
Importance of Professional Repair
Addressing trailer brake system faults demands expertise, as incorrect repairs can severely compromise safety. While some adjustments are manageable, complex issues—particularly those involving air brake systems or electronic controllers—require a qualified technician. Relying on professional diagnostics ensures accurate identification of the root cause, preventing further damage and ensuring optimal braking performance.
Ignoring professional assistance can lead to dramatically increased stopping distances, elevating the risk of collisions or loss of control, as highlighted in industry resources like the CCJs Air Brake Book. Technicians possess specialized tools and knowledge to properly adjust brakes, bleed lines, and replace worn components according to manufacturer specifications.
Always consult your trailer’s manual for specific maintenance recommendations and seek professional help when encountering unfamiliar issues. Prioritizing professional repair isn’t merely about fixing a problem; it’s about safeguarding lives and preventing potentially catastrophic incidents on the road.
Emergency Procedures in Case of Brake Failure
Experiencing trailer brake failure is a critical emergency demanding immediate, decisive action. First, gently ease off the accelerator and avoid sudden steering maneuvers. Downshift to a lower gear to utilize engine braking, significantly reducing speed. Simultaneously, activate your hazard lights to alert surrounding traffic to your compromised situation.
Carefully assess your surroundings and look for a safe place to pull over, ideally a wide shoulder or exit ramp. Avoid braking harshly, as this could exacerbate instability. If possible, use the emergency brake cautiously, understanding it may not provide sufficient stopping power.
Consult your trailer’s manual for specific emergency brake procedures. Once safely stopped, call for professional assistance; do not attempt to continue driving with compromised brakes. Remember, prioritizing safety and seeking expert help are paramount in this dangerous scenario.