The Willow Square Crochet Pattern is a versatile and popular design, perfect for creating beautiful blankets, home decor, and fashion accessories. Its delicate texture and timeless appeal make it a favorite among crafters of all skill levels.
What is the Willow Square?
The Willow Square is a charming crochet pattern that creates a delicate, lacy square design, often used in blankets, shawls, and home decor. Its intricate stitches mimic the graceful curves of willow branches, giving it a natural and timeless aesthetic. The pattern typically features a central motif with radiating details, creating a harmonious balance of texture and space. It is customizable, allowing crafters to choose colors, yarn weights, and sizes to suit their projects. The Willow Square is a versatile choice for both beginners and experienced crocheters, making it a popular selection for gifts, personal use, or community projects. Its beauty lies in its simplicity and adaptability, ensuring it remains a favorite in crochet communities worldwide.
Why is it Popular?
The Willow Square Crochet Pattern has gained immense popularity due to its elegant design and versatility. Crafters appreciate its simplicity, as it requires basic stitches and techniques, making it accessible to beginners while still offering enough complexity for experienced crocheters. The pattern’s adaptability allows for customization in color, size, and yarn weight, making it suitable for various projects like blankets, pillow covers, and clothing. Additionally, the finished product has a classic, timeless appeal that complements both modern and traditional decor. Its widespread use in social media and crochet communities further boosts its popularity, as crafters share their creations, inspiring others to try the pattern. This combination of aesthetics, ease, and flexibility makes the Willow Square a beloved choice among crocheters worldwide.
Materials and Tools Needed
To create the Willow Square, you’ll need medium-weight yarn, a crochet hook (typically size J/6.0mm), a tapestry needle, scissors, stitch markers, and a measuring tape. A PDF pattern is recommended for guidance.
- Medium-weight yarn
- Crochet hook (size J/6.0mm)
- Tapestry needle
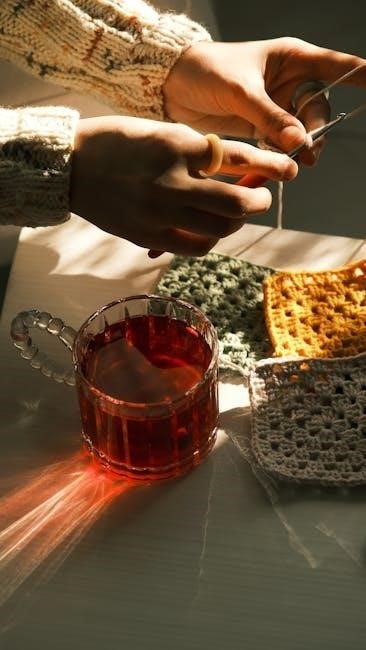
- Scissors
- Stitch markers
- Measuring tape
- PDF pattern (optional)
Yarn, Hook, and Notions
For the Willow Square Crochet Pattern, choose a medium-weight yarn that offers good stitch definition, such as acrylic or cotton blends. A size J (6.0mm) crochet hook is ideal. Use a tapestry needle for weaving ends, scissors for cutting yarn, and stitch markers to track your place. High-quality materials ensure a professional finish.
- Medium-weight yarn (acrylic or cotton blends)
- Crochet hook (size J/6.0mm)
- Tapestry needle
- Scissors
- Stitch markers
Additional Tools
Beyond the basics, having a few extra tools can enhance your crochet experience. Stitch markers are invaluable for tracking patterns or marking increases/decreases. A measuring tape or ruler ensures your squares are evenly sized. Sharp scissors are essential for cutting yarn cleanly, while a yarn needle helps weave in ends seamlessly. A crochet gauge ruler can help maintain consistent tension, and a blocking mat and pins are perfect for finishing your squares professionally. Optional tools like a stitch dictionary or crochet app can also aid in mastering complex stitches.
- Stitch markers
- Measuring tape or ruler
- Sharp scissors
- Yarn needle
- Crochet gauge ruler
- Blocking mat and pins
Step-by-Step Instructions
The Willow Square Crochet Pattern guides you through creating a stunning design. Begin with the foundation round, then progress through each round, and finish by seaming the squares together.
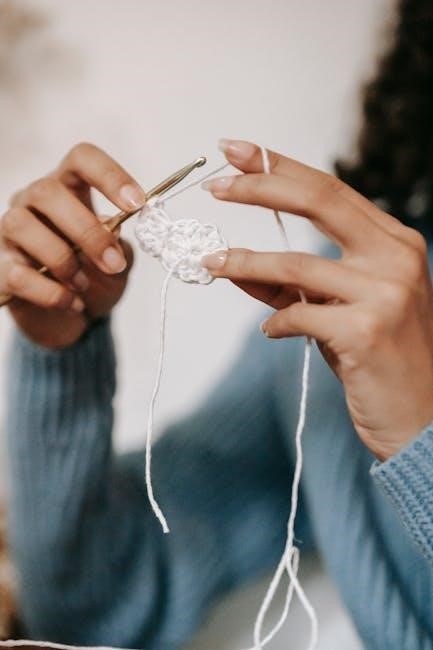
Foundation and First Round
Begin the Willow Square by creating a magic ring. Crochet a slip knot on your hook, then chain 2 to form the foundation. Work 6 single crochets into the ring, pulling the yarn tight to form a small circle. For the first round, chain 1, then crochet 2 double crochets in each stitch around the circle. Ensure to place 2 stitches in each corner and 1 stitch on the sides to maintain the square shape. Slip stitch to join the round, ensuring the edges are aligned. This creates the base for the square, setting the stage for the subsequent rounds. Keep the tension even to ensure the square lies flat and the stitches are uniform.
Subsequent Rounds
For the subsequent rounds of the Willow Square, continue by chaining 1 and crocheting evenly around the square. Increase stitches at each corner by crocheting 2 double crochets in the corner stitch. Maintain consistent tension to ensure the square shape remains intact. Each round builds on the previous one, expanding the square slightly. Pay attention to stitch counts to avoid misshaping the pattern. Use stitch markers to mark corners if needed. The texture becomes more defined with each round, creating a delicate yet sturdy fabric. Ensure to slip stitch at the end of each round to join seamlessly. This process repeats until the square reaches the desired size, following the pattern’s growth instructions precisely. The repetitive nature of the rounds makes the Willow Square a meditative and enjoyable project.
Seaming the Squares
Seaming the Willow Square crochet pattern is a crucial step to combine multiple squares into a cohesive project, such as a blanket or afghan. To achieve a professional finish, use a tapestry needle to whip stitch the squares together. Align the squares carefully, ensuring the stitches match perfectly to avoid puckering. Work from the right side of the fabric to maintain a seamless appearance. For a nearly invisible join, use the mattress stitch or single crochet method. Always use the same yarn and a needle that blends with the yarn color. Seaming requires patience and precision, but the result is well worth the effort for a polished, finished piece. Proper seaming enhances both the durability and the visual appeal of your crochet project.

Tips and Tricks
Use stitch markers for complex patterns, maintain consistent tension, and block squares before seaming for a polished finish. Choose complementary colors for a cohesive design.
Choosing the Right Yarn
Selecting the appropriate yarn for the Willow Square Crochet Pattern is crucial for achieving the desired texture and drape. Opt for yarns with good stitch definition, such as medium-weight acrylic or cotton blends, which provide clarity to the intricate stitches. Consider the season and intended use of the project; for example, cotton is ideal for spring and summer, while acrylic offers warmth for winter. Color choice is also essential—neutral tones for a classic look or vibrant hues for a modern twist. Ensure the yarn weight matches the recommended gauge to maintain the square’s shape and size. Experimenting with different yarns can transform the pattern into unique, personalized creations.
Avoiding Common Mistakes
When working on the Willow Square Crochet Pattern, it’s important to avoid common mistakes that can disrupt the design. Inconsistent tension is a frequent issue—ensure stitches are neither too tight nor too loose. Miscounting stitches is another pitfall; use stitch markers to keep track and count periodically. Additionally, using the wrong hook size can alter the square’s size and texture, so always swatch beforehand. Pay attention to pattern instructions, as small errors in stitch placement can lead to noticeable flaws. Finally, avoid rushing—methodical stitching yields the best results. By being mindful of these potential pitfalls, you can achieve a professional-looking Willow Square.
Variations on the Pattern
Explore color variations, size adjustments, and embellishments to personalize the Willow Square. Try gradient hues, add appliques, or mix yarn weights for unique textures and visual interest.
Color and Size Options
The Willow Square Crochet Pattern offers endless possibilities for customization. Crafters can choose from a wide range of colors to match their personal style or home decor. Opt for soft pastels for a delicate look or bold hues for a statement piece. Size adjustments are also easy, allowing you to create everything from small coasters to large blankets. Experiment with gradient effects by transitioning between shades or add texture with multi-colored yarns. Additionally, the pattern can be scaled up or down, making it versatile for projects like scarves, pillow covers, or even clothing. With such flexibility, the Willow Square design can suit any skill level and aesthetic preference.
Embellishments
The Willow Square Crochet Pattern can be beautifully enhanced with various embellishments to add a personal touch. Consider adding beads, appliques, or floral motifs to create a unique design. For a more elegant look, incorporate ribbon embroidery or subtle crochet flowers. Buttons, sequins, or even small bows can also add texture and visual interest. Many crafters enjoy experimenting with yarn pom-poms or tassels for a bohemian vibe; Additionally, stitching patterns like cross-stitch or embroidery can be integrated to create intricate details. These embellishments allow you to customize the Willow Square to suit your style, whether you prefer minimalist charm or vibrant, eye-catching designs. With a little creativity, your project can truly stand out.
Finishing Touches
Blocking the crochet square ensures a professional finish by evening out stitches. Weaving in ends neatly completes the project. Adding a decorative border or personalized label enhances its charm.
Blocking the Square
Blocking is a crucial step in finishing the Willow Square Crochet Pattern. It involves wetting the crocheted square, stretching it to the desired shape, and pinning it to dry. This process ensures even stitching and enhances the texture of the pattern. Use a blocking mat or a large towel to pin the square securely. Measure the square to maintain consistency, especially if creating multiple squares for a larger project. Allow the square to air dry completely, which may take several hours or overnight. Once dry, remove the pins, and the square will retain its shape beautifully. Blocking not only professionalizes the finish but also makes seaming easier if you plan to join multiple squares. It’s a simple yet transformative step that brings out the full beauty of the Willow Square design.
Weaving in Ends
Weaving in ends is a essential step to complete the Willow Square Crochet Pattern. This process ensures a clean and polished finish by hiding loose yarn tails. Using a yarn needle, thread the end of the yarn and weave it through the stitches on the wrong side of the square. Move the needle in different directions to secure the yarn and prevent it from coming loose. Be patient and take your time to keep the weaving neat and even. Avoid pulling the yarn too tightly, as this can pucker the fabric. Once all ends are woven in, trim the excess yarn close to the fabric. This step is crucial for maintaining the professionalism and durability of your finished project. A well-done weave ensures your Willow Square looks its best.
Where to Find the Willow Square Crochet Pattern PDF
The Willow Square Crochet Pattern PDF is available on platforms like Etsy, Pinterest, and Ravelry. Search for “Willow Square Crochet Pattern PDF” to find both free and paid options.
Free Patterns
Free Willow Square Crochet Pattern PDFs are widely available online, offering a cost-effective way to start your project. Websites like Pinterest, Ravelry, and crochet blogs often provide downloadable versions. These patterns are perfect for crafters on a budget or those looking to explore the design before investing. Many free versions include detailed instructions, stitch guides, and photos to help you create a beautiful Willow Square. Some platforms may require signing up for a free account to access the download. Always ensure you’re downloading from reputable sources to avoid low-quality or incomplete files. Free patterns are a great way to get started and enjoy the creative process without financial commitment.
Paid Patterns
Paid Willow Square Crochet Pattern PDFs offer enhanced features and premium quality for crafters seeking detailed guidance. These patterns are available on platforms like Etsy, Ravelry, and specialty crochet stores. They often include high-resolution images, video tutorials, and customizable options. Paid versions may also provide additional sizes, yarn weight variations, and step-by-step instructions for complex stitches. Some designers offer exclusive content, such as tips for seamless joins or advanced techniques. While free patterns are a great starting point, paid versions are ideal for crafters looking for professional-grade results or unique design elements. Prices vary, but many paid patterns are affordable, making them a worthwhile investment for serious crochet enthusiasts. Always check reviews and previews to ensure the pattern meets your needs.